


Hiking the Kaʻau Crater Trail on Oʻahu, Hawaiʻi
Distance: 4.7 miles / 7.6 km
The Kaʻau Crater Trail in the southern Koʻolau Mountains on Oʻahu is a renowned favorite on the island that attracts both residents and visitors alike!
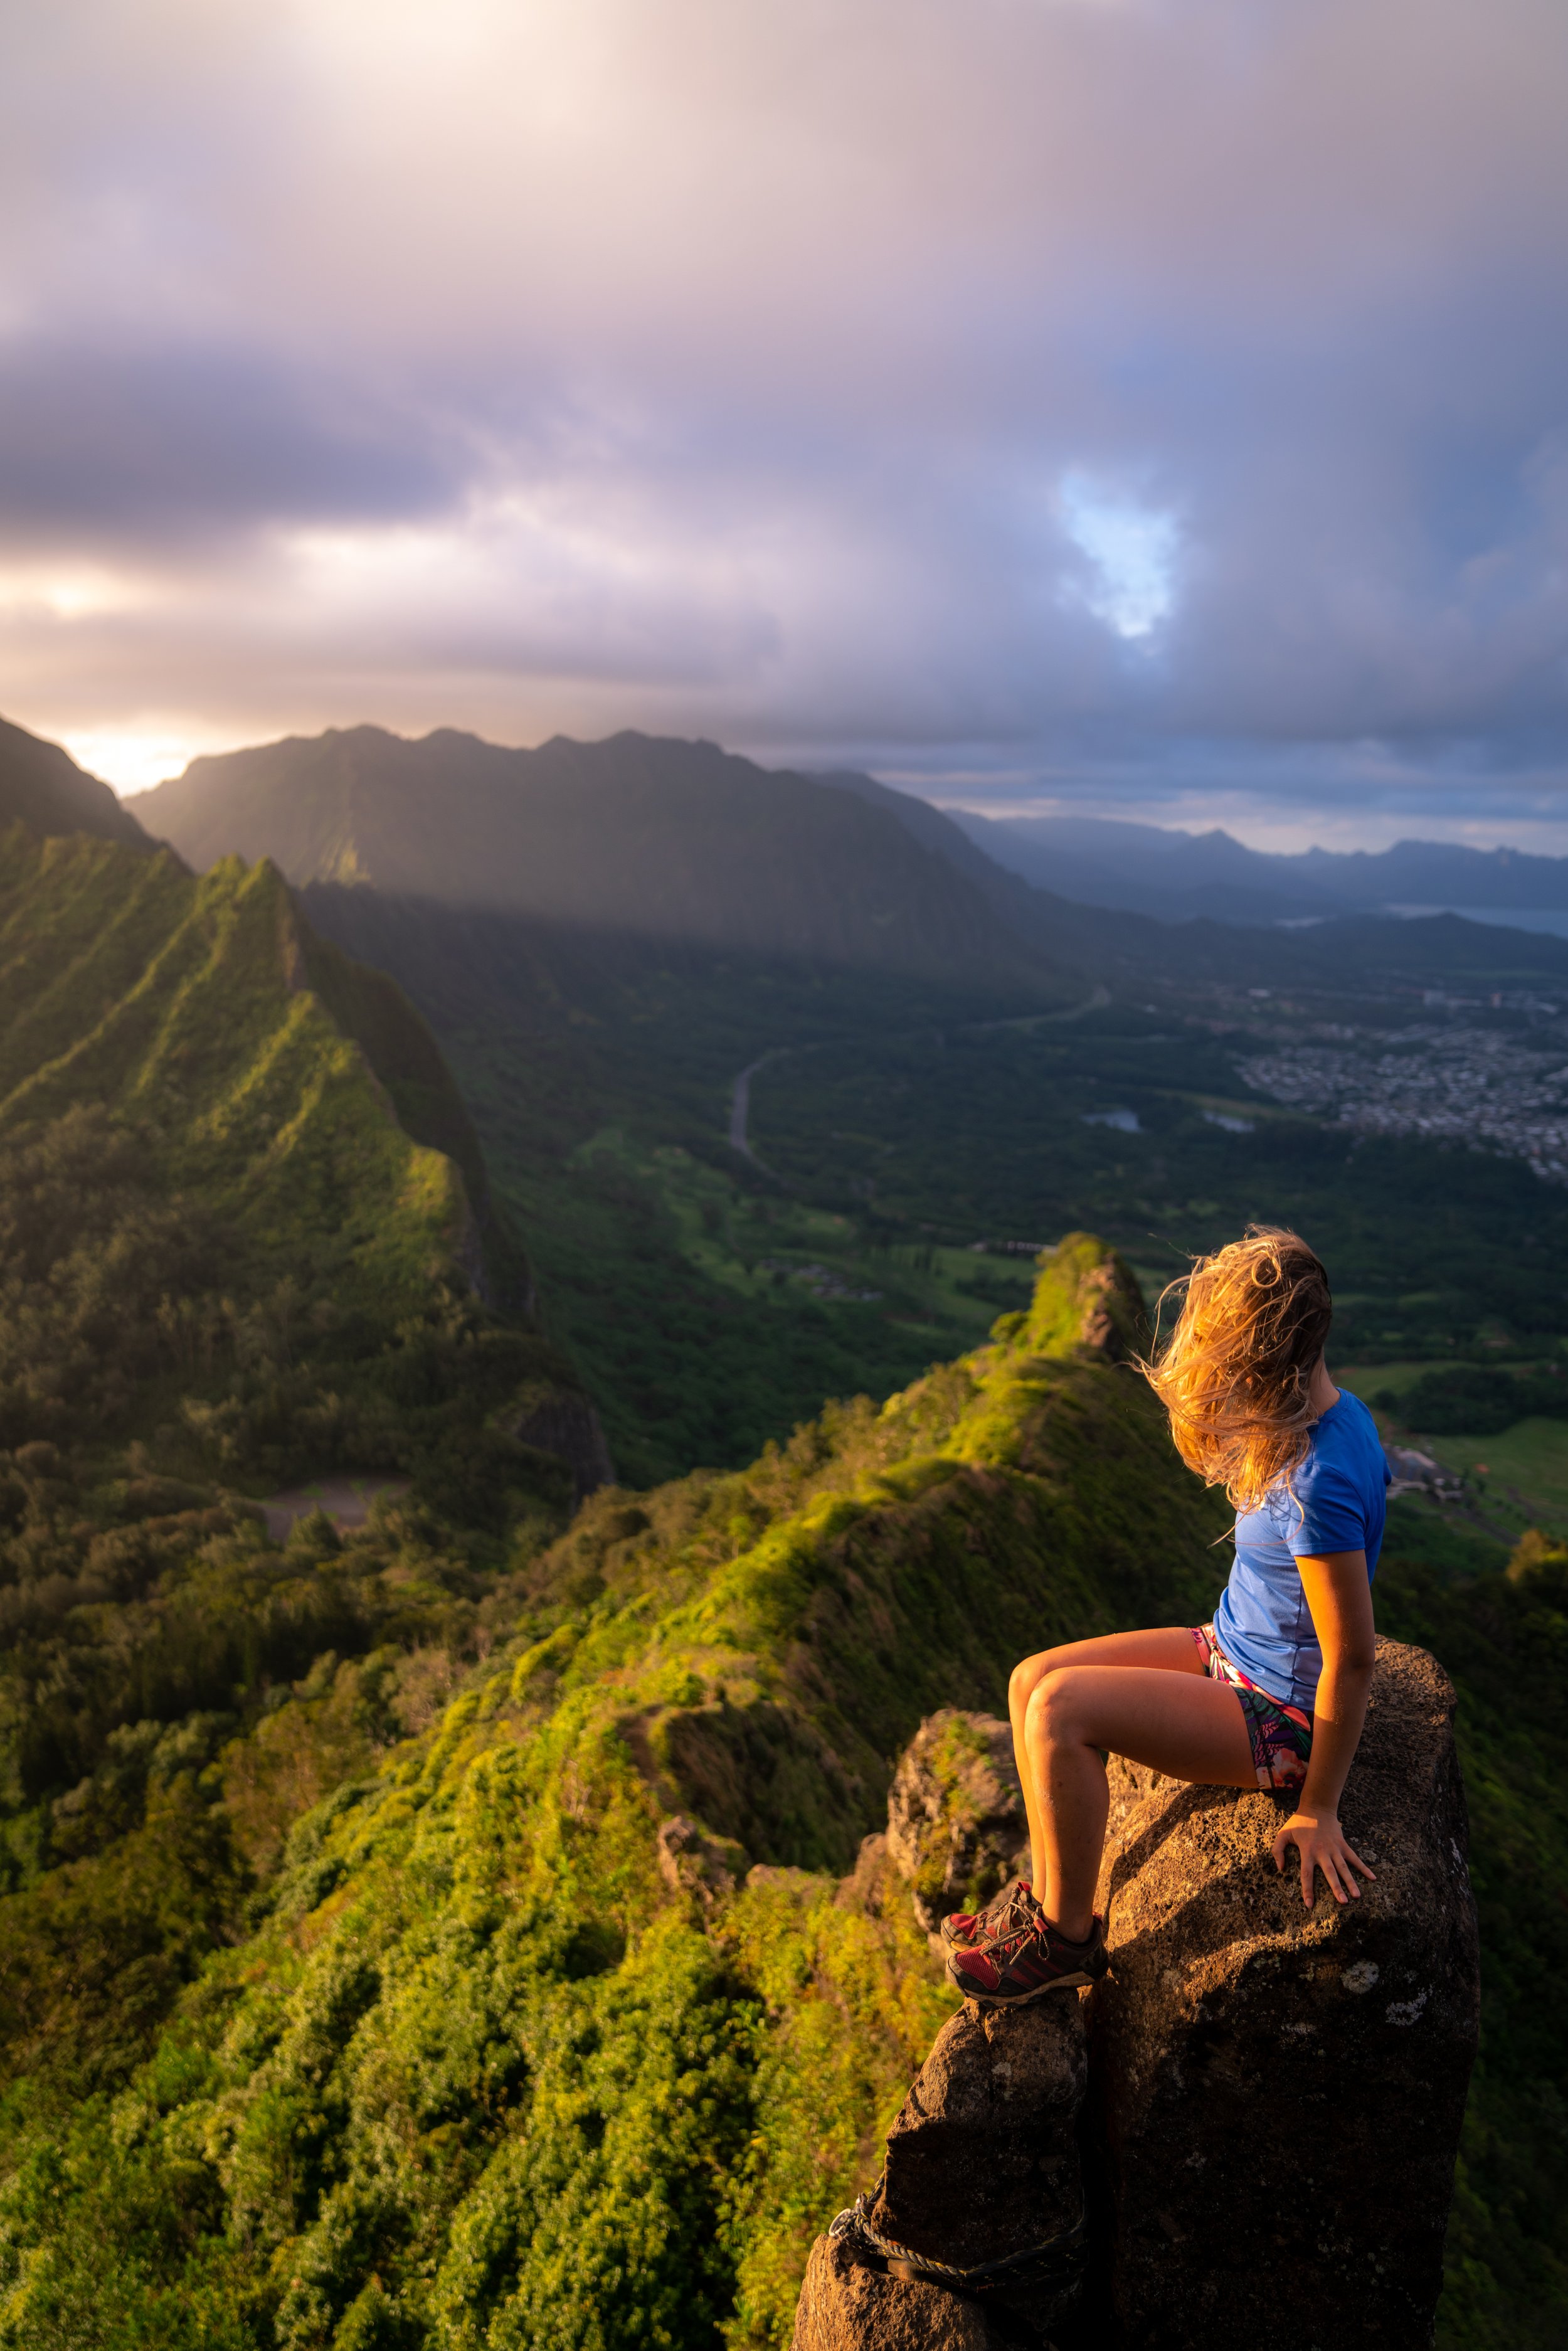
This is because the full Kaʻau Crater Loop ascends past three different waterfalls, loops around a dormant volcanic crater, and offers summit views that span much of Oʻahu’s east side, which inevitably make the Kaʻau Crater Trail one of Honolulu’s best and most popular day hikes!
For these reasons, I recommend hiking the Kaʻau Crater Trail on a weekday over a weekend, in order to enjoy a much less-crowded experience.
In addition, I think it’s important to note that the hardest part of the Kaʻau Crater hike is the first 2.1 miles (3.4 km) to the summit of Puʻu Palikea (the first peak). I say this to emphasize that it’s not worth turning back upon reaching the summit, as the hike only gets easier by completing the entire loop.
Kaʻau Crater Trailhead Parking
Parking for the Kaʻau Crater Trail is located on Waiʻōmaʻo Road in the back of Pālolo Valley.
If you see a parking spot on the side of the road within 0.5 miles (0.8 km) of the trailhead, take it, as it only gets more difficult to park the closer you get to the trailhead.
Google Maps Directions: Kaʻau Crater Trailhead
My Hawaiʻi Hiking Checklist
Osprey 3L Water Bladder - The Osprey 3L water bladder is the most universal hiking and backpacking water bladder on the market, and it’s my go-to because of the slide-off seal that allows it to be quickly filled from the top. Additionally, individual parts are easily replaceable, such as the bite valve.
Blister / Heel Protectors - I swear by these cheap, amazing heel protectors to prevent blisters for nearly every kind of hiking and backpacking that I do!
Black Diamond Headlamp - Personally, I recommend the Black Diamond Storm because it is one of the brightest, lightest, and longest-lasting headlamps on the market—and trust me, the weight-to-battery-life ratio really does matter!
Hiking / Trail Running Shoes - Depending on the type of trail, I prefer to use either the Keen Targhee for longer, more rugged hiking or the HOKA Zinal Trail-Running Shoe for lighter, less intense trails. In either case, both have been amazing to me for many years across countless environments, and both can be found in men’s and women’s sizes. - (Men’s Keen / Women’s Keen) (Men’s HOKA / Women’s HOKA)
Waterproof Rain Shell - You never know when it may rain, and I’ve learned over the years that a rain shell is far better than a rain jacket. By this, I mean that it’s best to have something that the water will roll right off of, which is why I recommend the Patagonia Torrentshell 3L available in both men’s and women’s sizes.
High SPF Sunscreen - Packing high-SPF sunscreen is a must for long days outside!


Hiking the Kaʻau Crater Trail
The Kaʻau Crater Trail begins at the very end of Waiʻōmaʻo Road on the left-hand side.
Initially, the trail drops down a steep down-climb to the Waiʻōmaʻo Stream, which will parallel the trail for the next 1.8 miles (2.9 km) until the start of Kaʻau Crater.
This spot will almost always be muddy because of a natural spring; however, it’s important to know that the entire Kaʻau Crater Trail can be one of the muddiest hikes on Oʻahu, regardless of whether it has recently rained or not.
Kaʻau Crater Pipe Trail
When you reach pipe, follow it all the way to the first waterfall.
Sometimes people call it the Kaʻau Crater Pipe Trail because it goes on for so long!
These are the first views of the summit that you get from the valley.
Can you spot the Māmaki?
Up to this point, it was one of the few native plants that I noticed.
That being said, if you are curious about trying the native Hawaiian Māmaki tea, I kindly ask that you don’t harvest Māmaki from our native forests but, instead, buy from one of the local reputable vendors, such as those listed below.


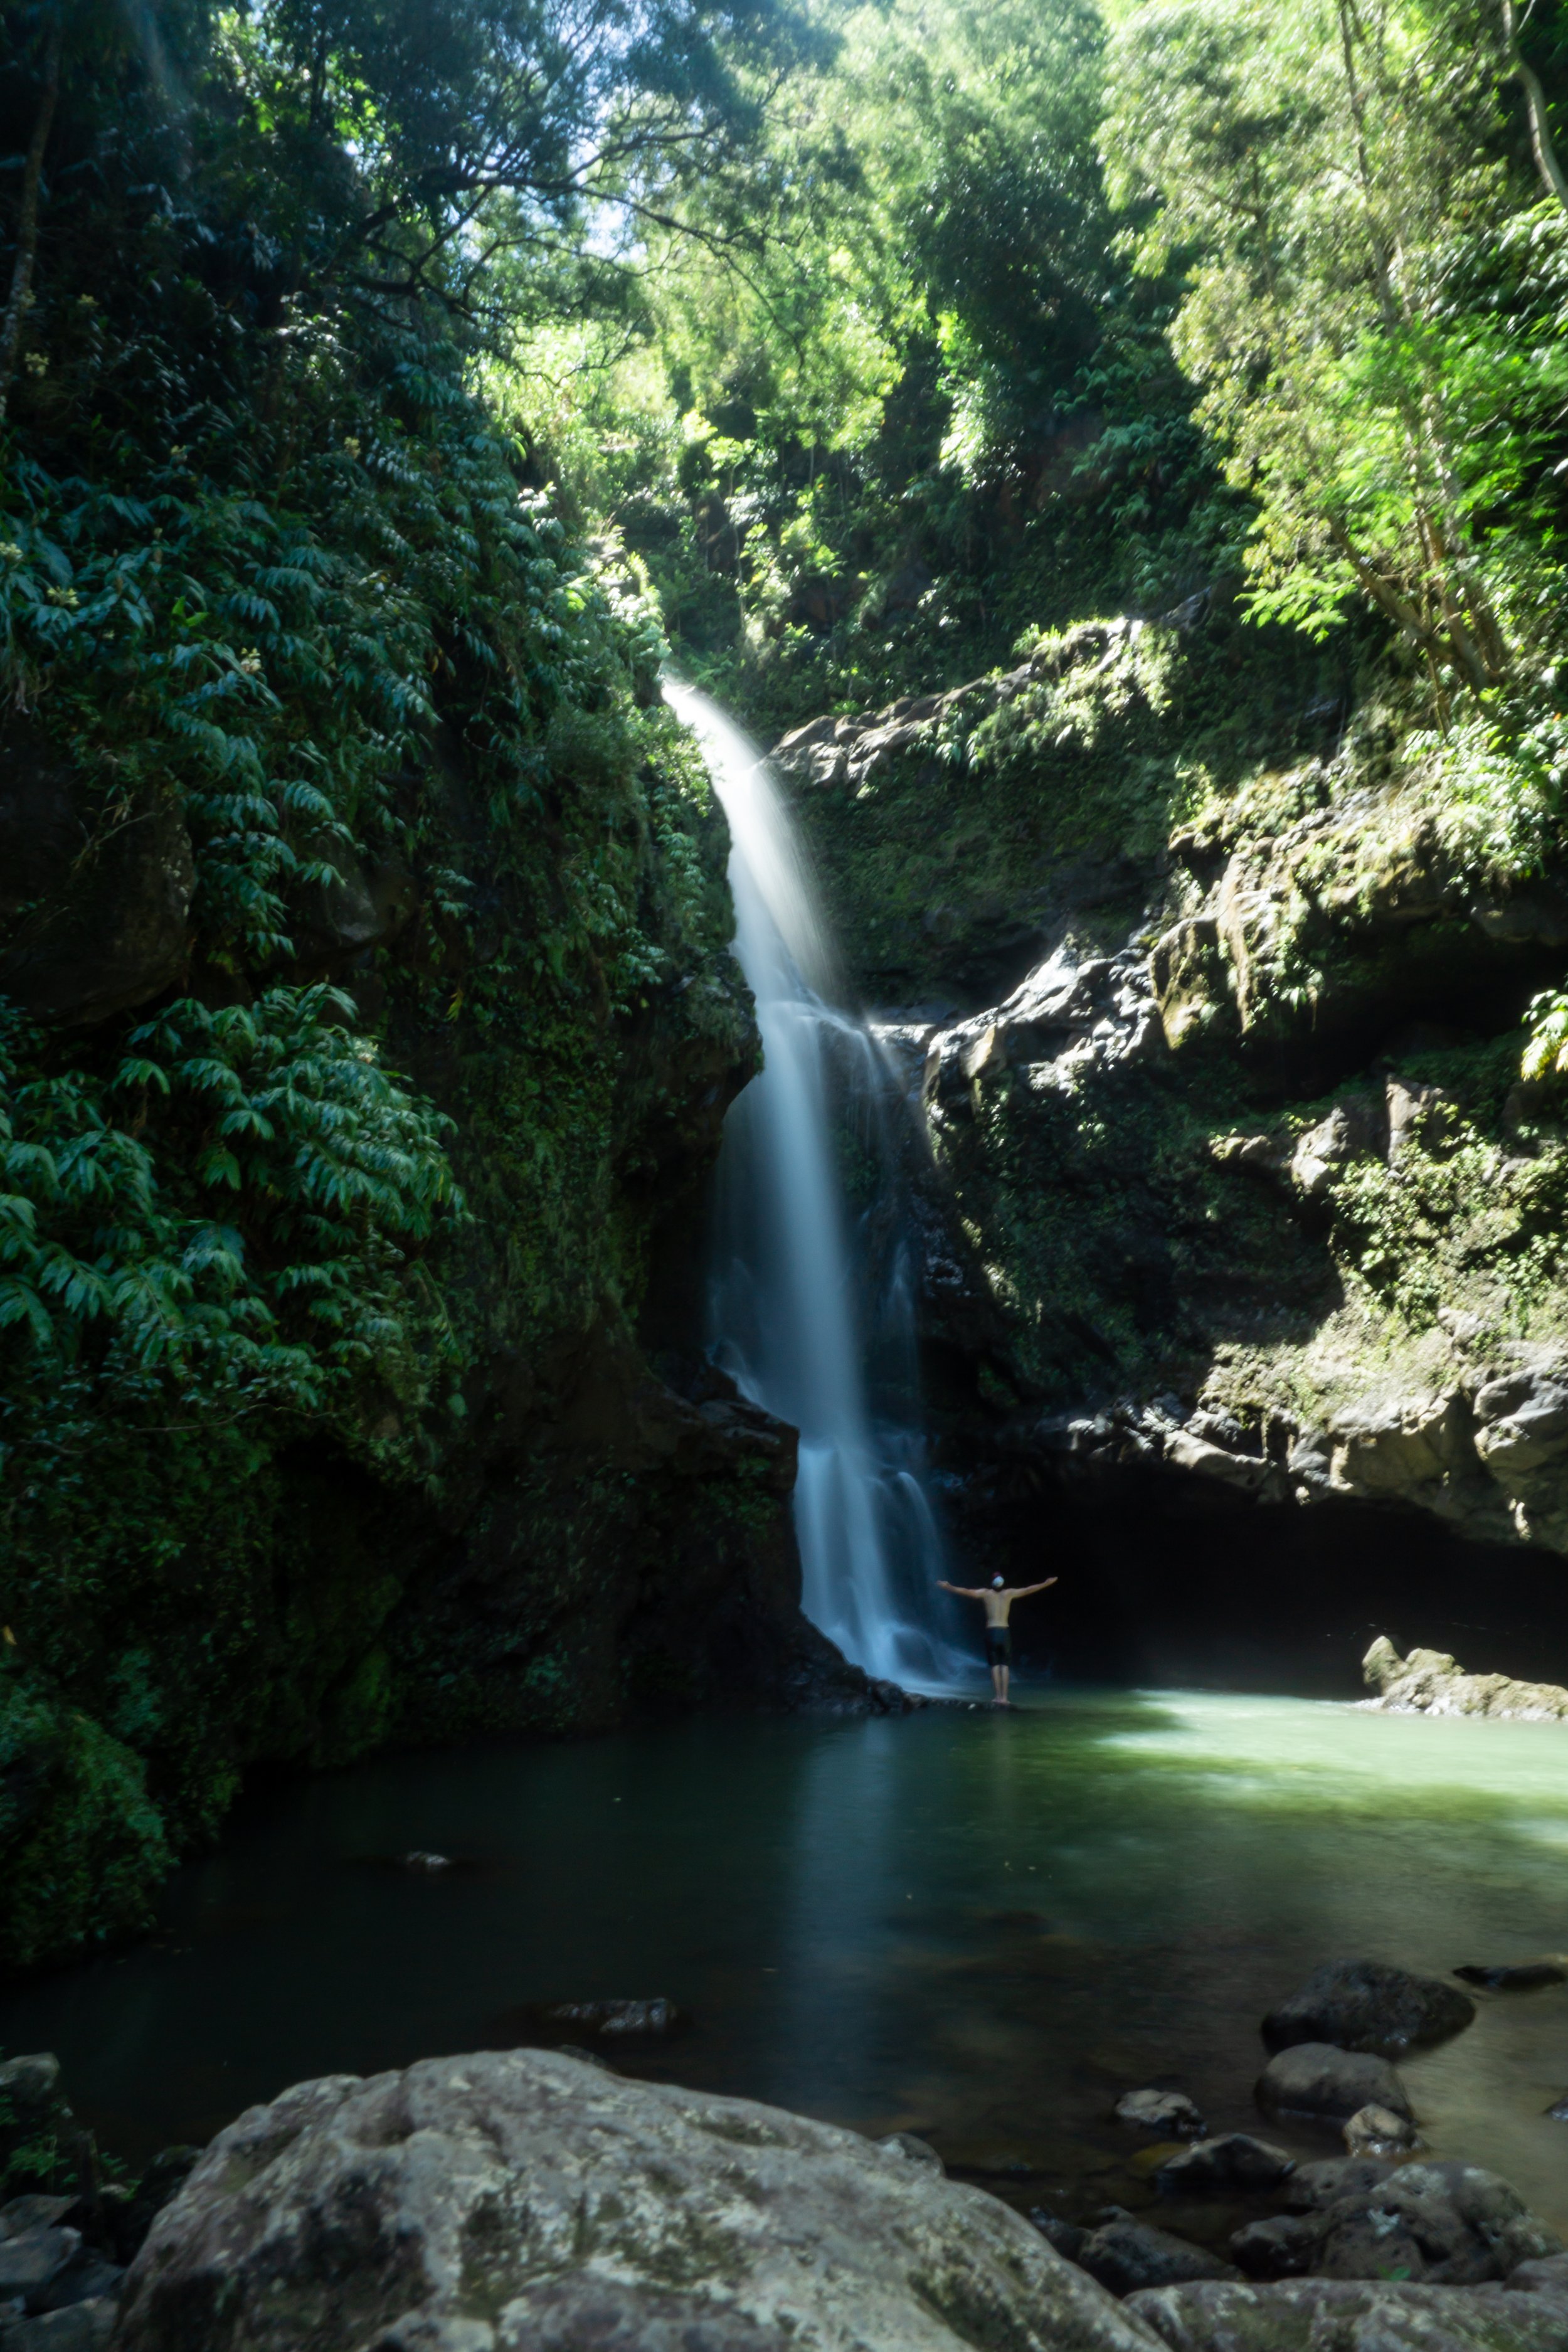
First Waterfall
This is the split for the first waterfall, but it isn’t located directly on the trail.
Therefore, to check out the first waterfall, go right or to continue up the Kaʻau Crater Trail, go left.
Above the first waterfall, the next two will come shortly after.
Second Waterfall
Unlike the first falls, the second is right on the main trail.
To continue further, the trail goes up and around the second waterfall on the right side.
Warning
This small section in the next two photos is easily the most dangerous part on the entire trail, and hikers have lost their lives here before.
Therefore, be sure to grab something solid, as you make your way past the top of the second waterfall.
Third Waterfall
The third waterfall is the last waterfall on the Kaʻau Crater Trail, and it’s the only one where you either have the option of climbing up the falls or continuing up the ridge to the left.
Both are fairly steep, but the ridge is generally the safer option.
If you were to slip and fall on the third falls, it’s likely that you would fall to the bottom, as it has happened in the past. However, if you slipped on the side trail, you would likely be caught by the overgrowth well before the bottom of the climb.
I took the side trail because I was hiking alone.
Both options are pretty steep!
At the top of the side trail, go right to continue up the best trail around the crater.
Initially, it will lead down to the stream, where the route up the third waterfall comes up.
Once at the stream, take the trail heading up the ridge on the far side.
From here, it’s one steep climb up to the summit of Puʻu Palikea.
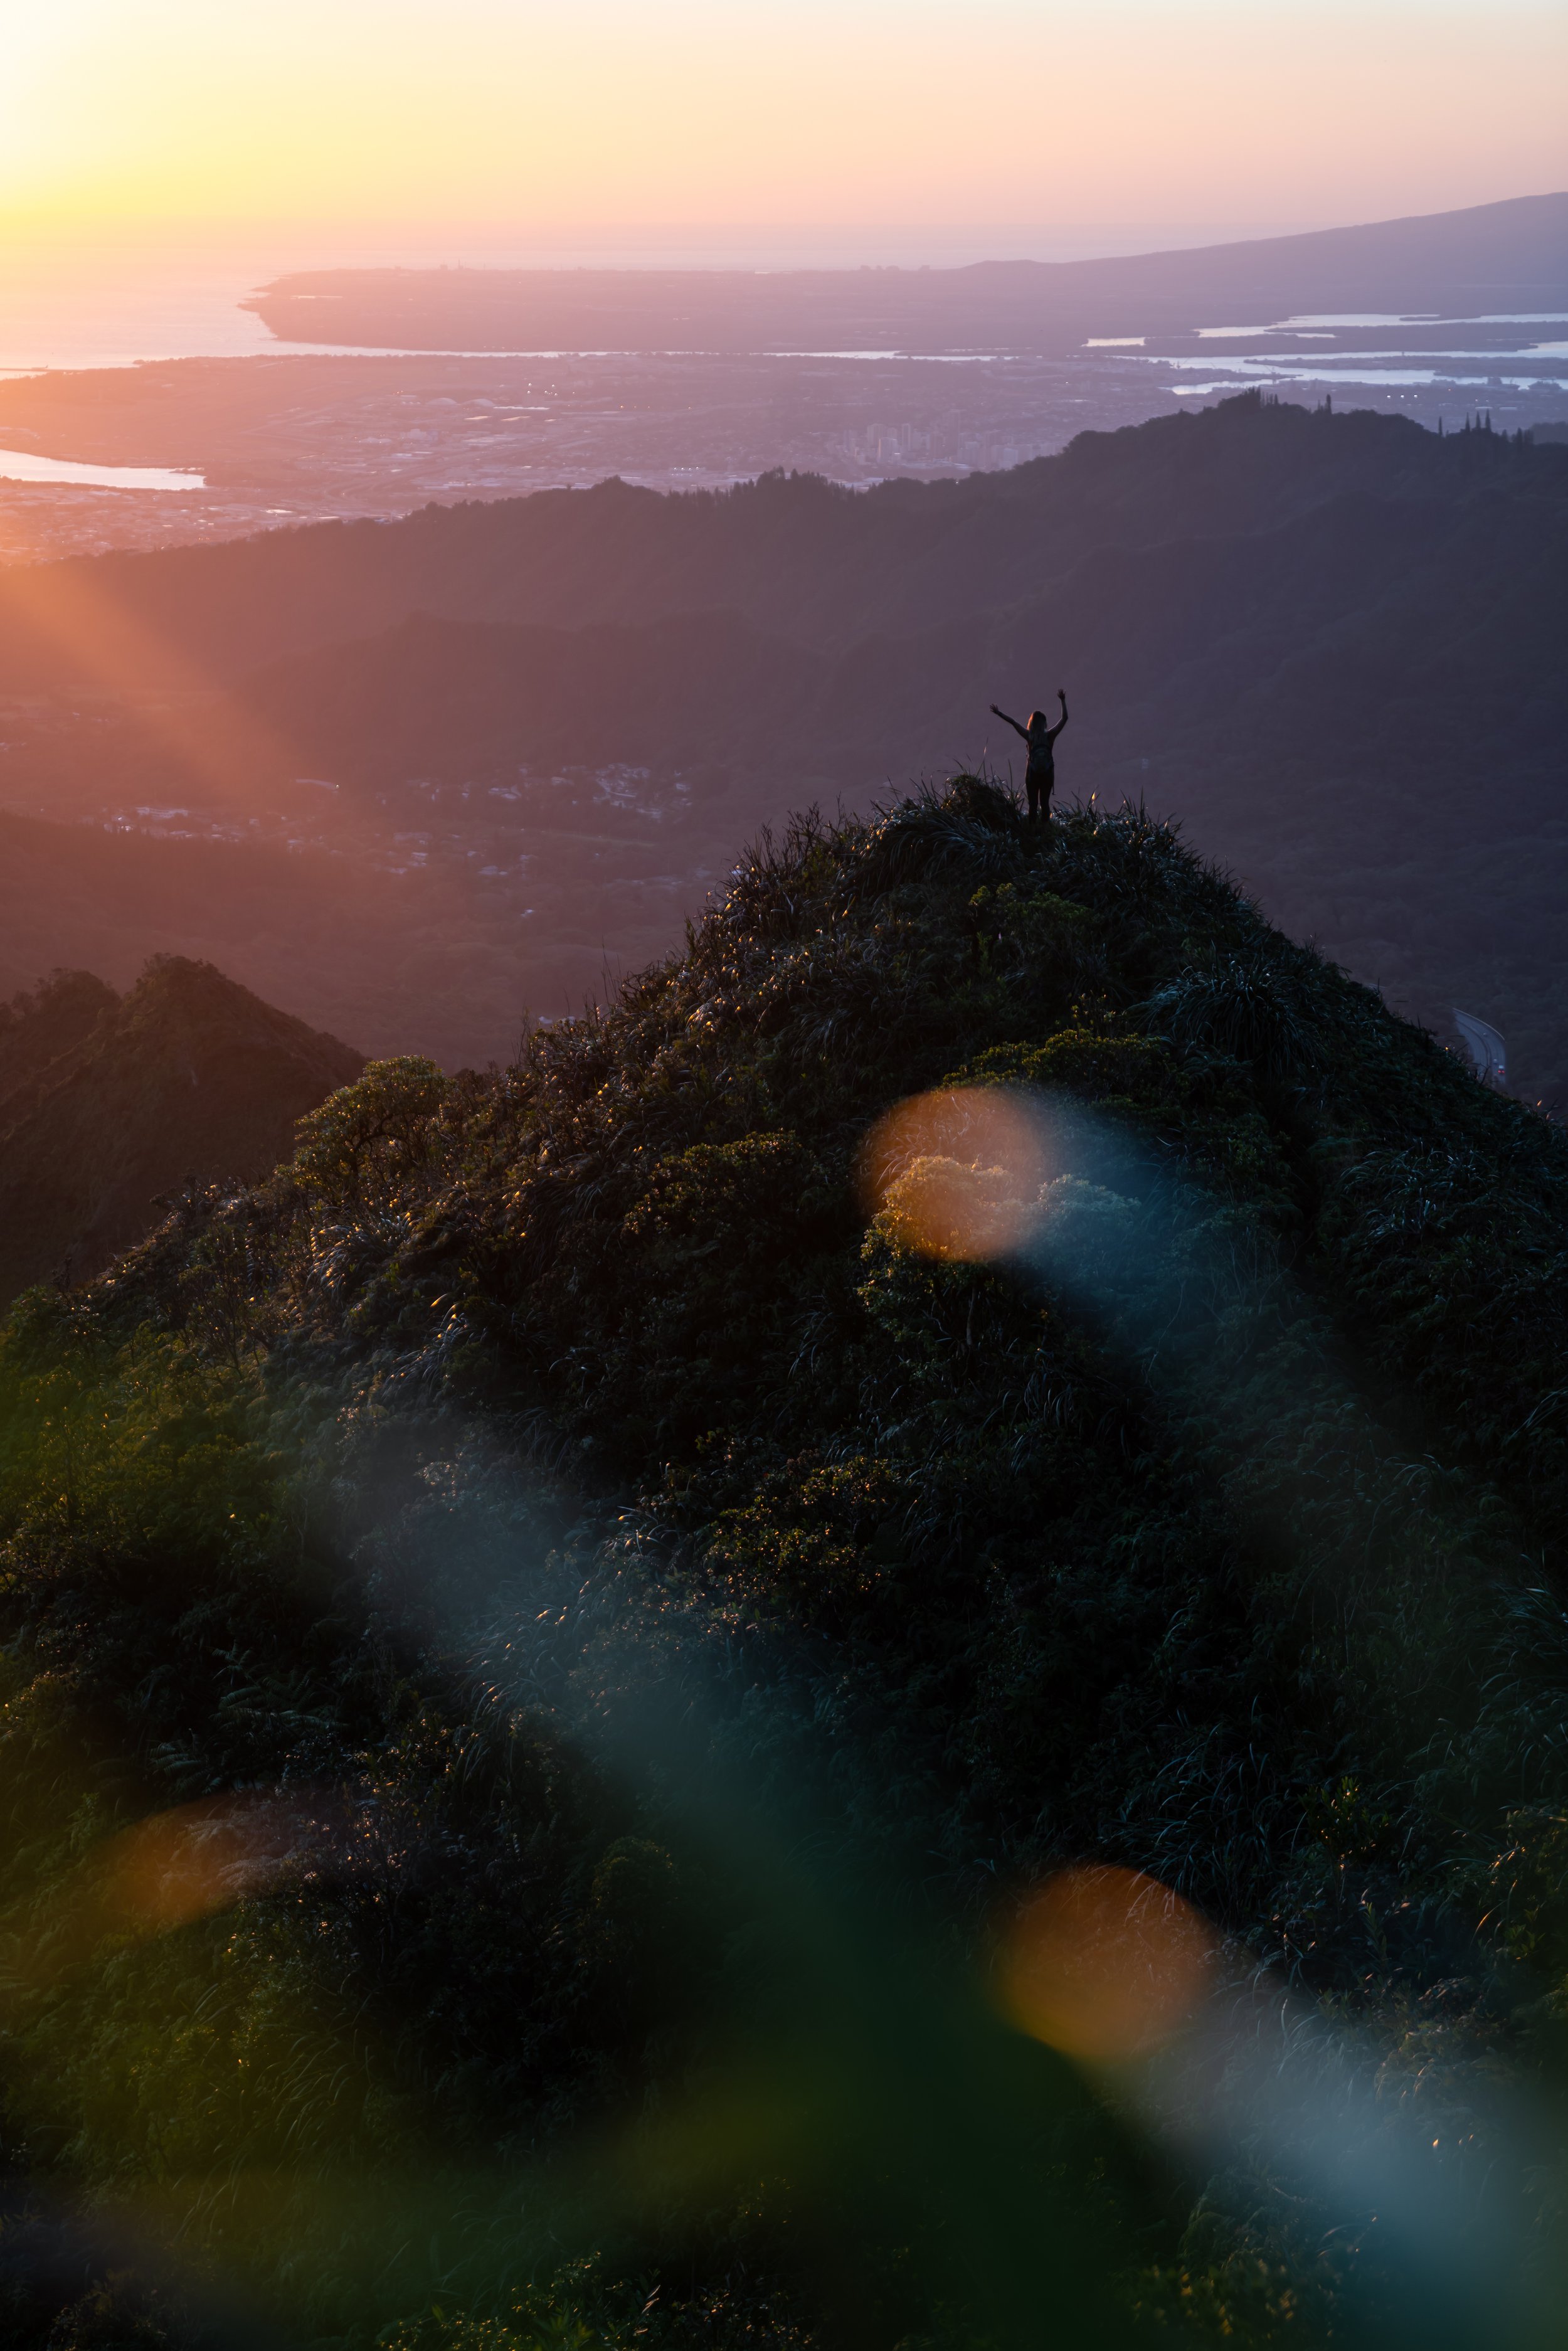
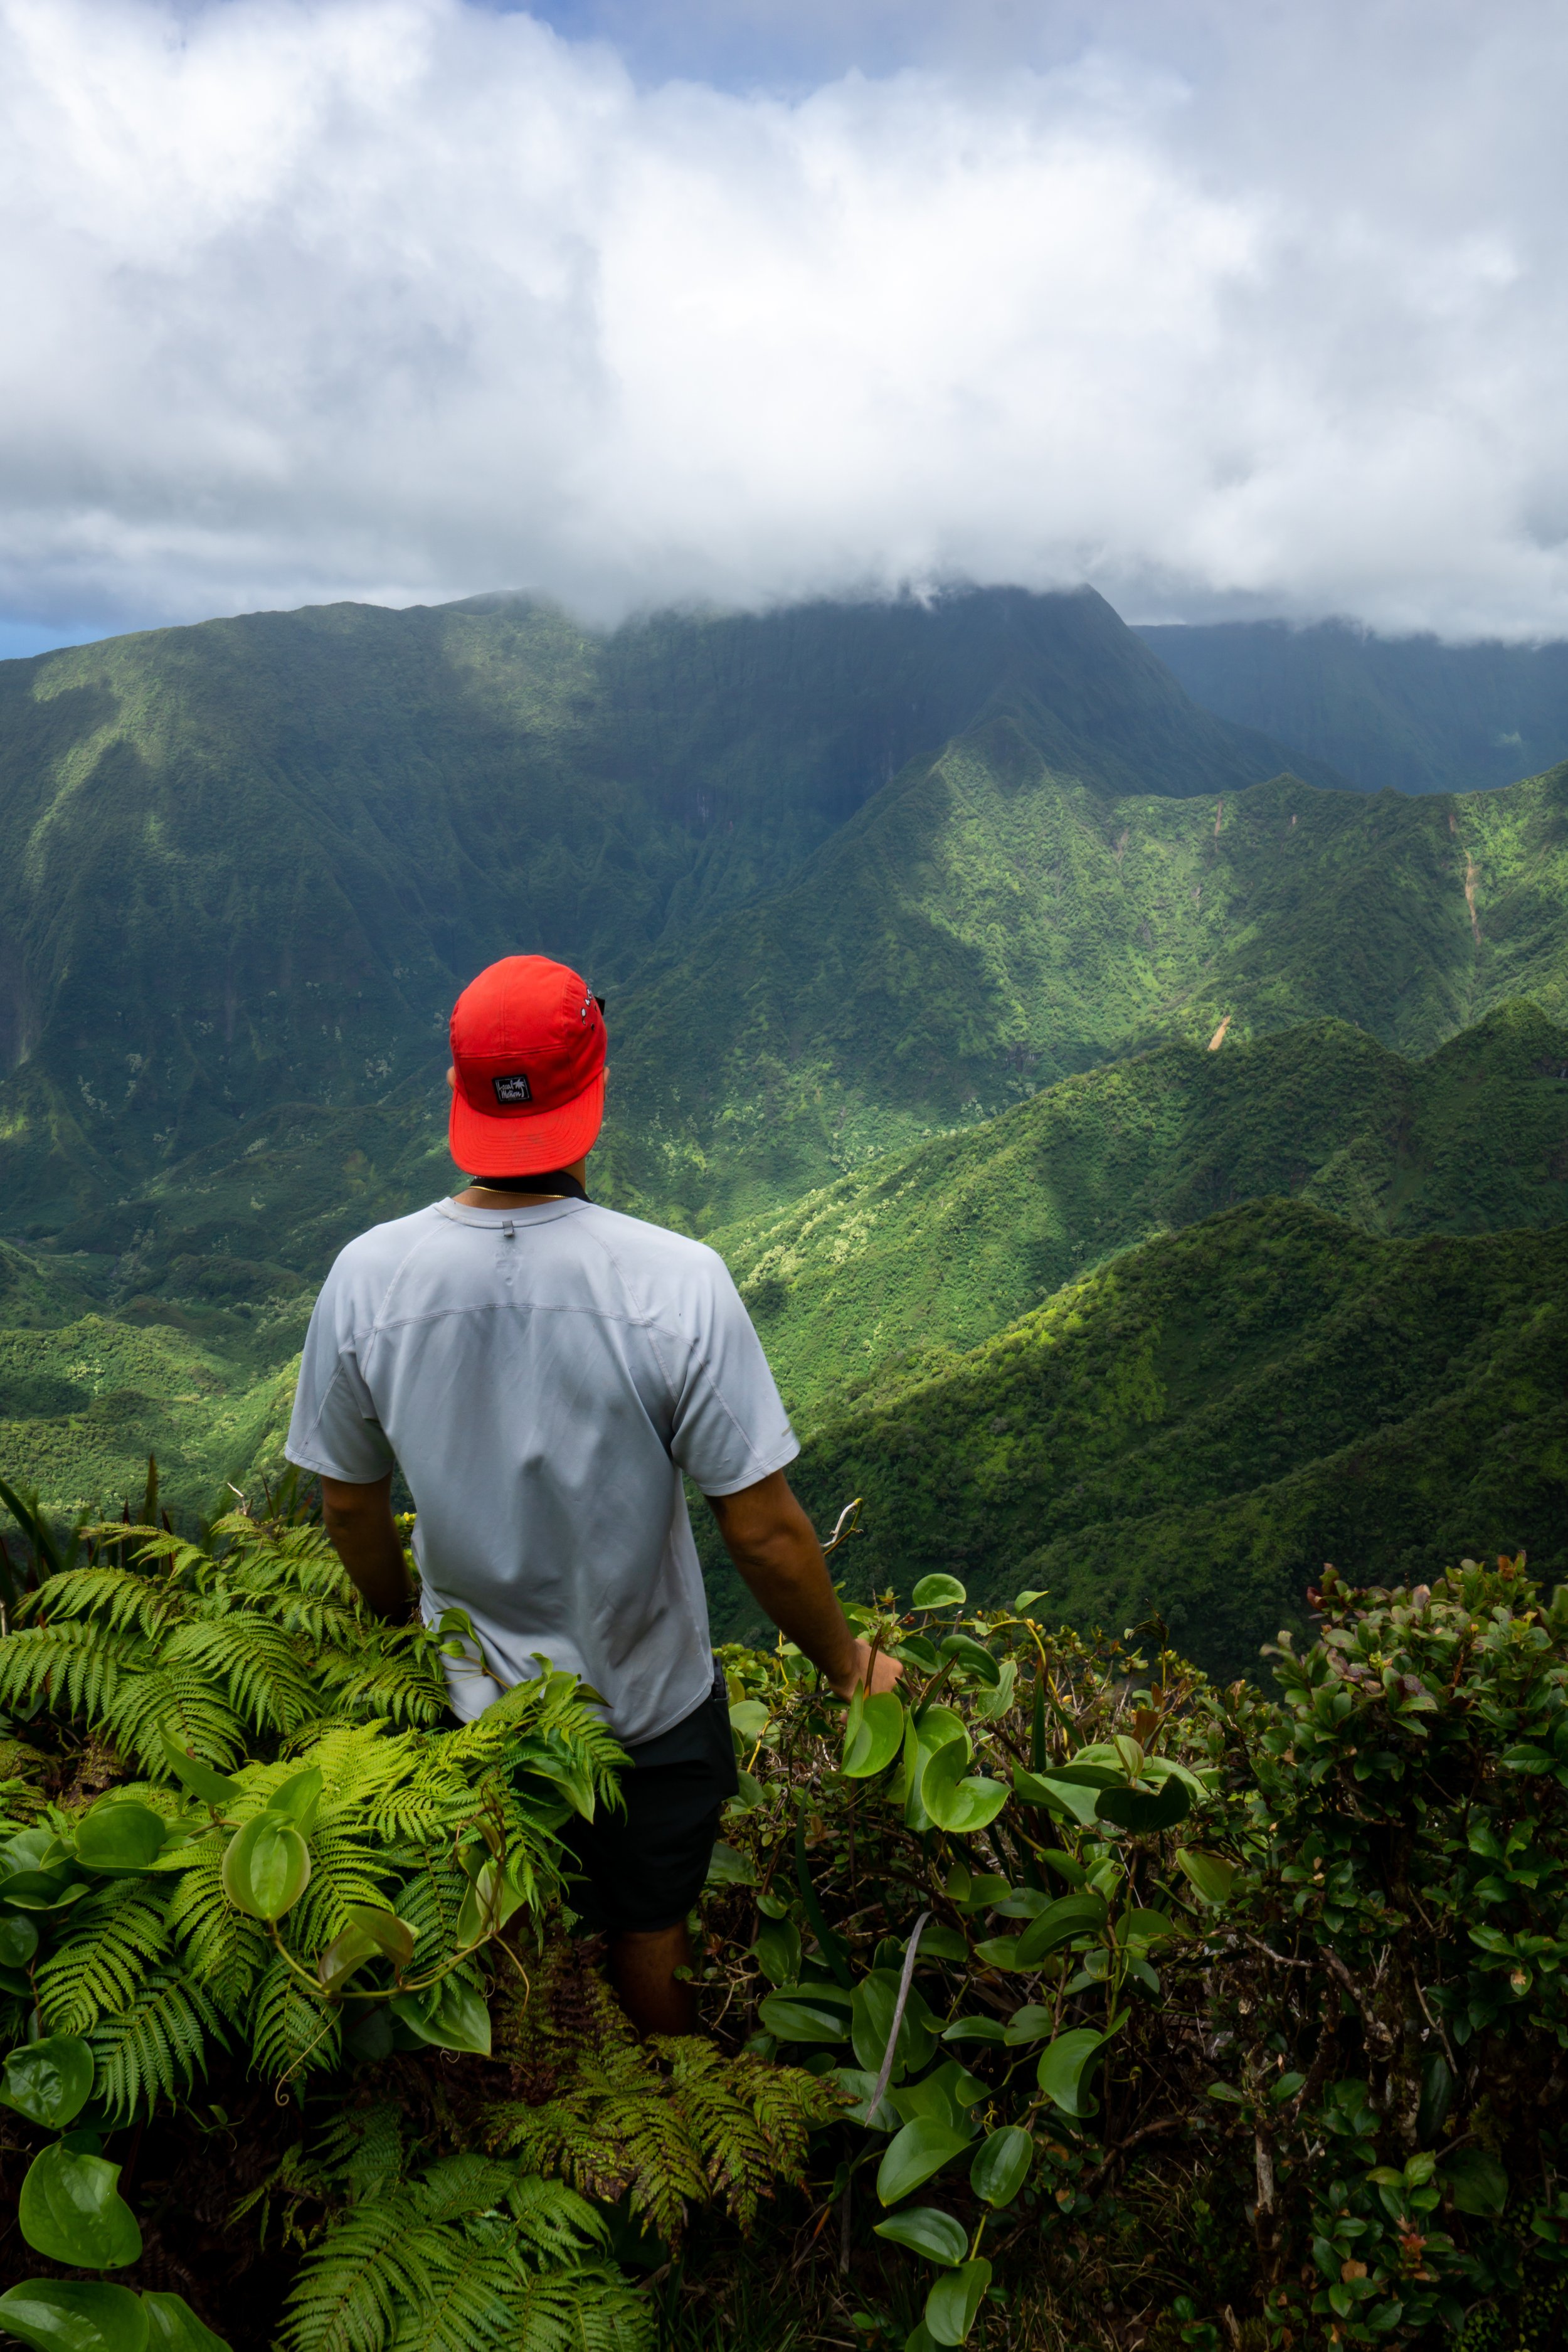
Puʻu Palikea
As mentioned previously, don’t turn back if you’ve made it to Puʻu Palikea.
I say this because turning back around is significantly more difficult than hiking further around to the north side of Kaʻau Crater.
This is because when the trail meets back with the Waiʻōmaʻo Stream from the beginning, you only have 0.4 miles (0.6 km) to hike back out to the trailhead compared to the three waterfalls, with much longer pipe trail immediately following.
Koʻolau Summit Trail (KST)
The short Koʻolau Summit section of Kaʻau Crater moves fairly quick, and as mentioned previously, the ridge back down cuts out some of the most annoying sections through Pālolo Valley.
Read My Separate Post: Koʻolau Summit Trail (KST)
North Puʻu Palikea
After the second power line, start looking for the turn back down the north side of Kaʻau Crater.
It’s not very obvious, but as long as you’re watching where the ridge on your left meets the summit, you shouldn’t miss it.
However, if you happen to hike past the turn, the next major trail down is Waʻahila Ridge from Mt. Olympus, which is the peak visible in the distance in the photos below.
Read My Separate Post: Koʻolau Summit Trail (KST)
This view in the photo below will be the last view of the crater before turning back down the return ridge.
Kaʻau Crater Loop-North Ridge Junction
Turn right to continue back down the north ridge into Pālolo Valley, as the less obvious trail on the left completes the loop around the crater where the side trail and third waterfall initially ascended.
In my opinion, the north ridge is like a highway compared to the slow and tedious pipe trail below.
I say this because it’s less overgrown, there’s less rock hopping, and it’s not too steep of a descent compared to the beginning.
Waiʻōmaʻo Stream
At the bottom of the ridge, the Kaʻau Crater Trail crosses back over the Waiʻōmaʻo Stream, with only 0.4 miles (0.6 km) left to hike to reach the trailhead.
This photo below is looking back at the split for the north ridge on the left versus the pipe trail on the right.
It’s not an obvious split to notice, which is why most hikers ascend up Kaʻau Crater via the pipe trail.
Native Plants on the Kaʻau Crater Trail
There are tons of different native Hawaiian plants to see on the Kaʻau Crater Trail once you reach the higher elevations around the loop.
Some of these include ʻŌhiʻa lehua, Koa, Māmaki, ʻAhakea, Kōpiko, and ʻŌhelo, to name a few.
If you’d like to know more about these and tons of other native Hawaiian plants from across the islands, I encourage you to check out my separate post.
Read My Separate Post: Native Hawaiian Plant Guide
More Oʻahu Adventures
If you’re interested in reading about some more amazing Oʻahu adventures, check out my separate posts below!


Best Hotels & Restaurants in Waikīkī
If you’re trying to decided where to stay on Oʻahu, check out my top 10 list for the best resorts and restaurants in Waikīkī.
I break down what makes one hotel a better choice over another, so that you can find the best fit for your stay on the island.
Read My Separate Post: Best Waikīkī Hotels & Restaurants

Waikīkī
HNL Airport-Hotel Shuttle
Prices on ride-share apps like Uber/ Lyft cannot beat the price of booking your hotel shuttle prior to arrival. I say this because there are additional fees for ride-share airport pick-ups at Honolulu Airport (HNL), which is why I recommend booking your transportation in advance using the options below.
Additionally, the last option below will go as far as the Ko ʻOlina Resorts on the West Side and Turtle Bay on Oʻahu’s North Shore!
Best Way to Book Rental Cars!
I travel quite a bit, and I know firsthand that finding a good rental car deal can be a challenge, but that’s why I recommend comparing all of your options with Discover Cars.
In short, Discover Cars is a well-known, reputable business that allows you to search for the best deal across companies, and they have the best full-refund cancellation policy I’ve ever seen, valid up to 72, or sometimes even 48, hours prior to your reservation!
Book Here: Discover Cars

Oʻahu
Visiting Other Islands
If you are visiting Oʻahu or heading to another island, check out some of my personal recommendations for Oʻahu, Maui, Kauaʻi, Molokai, Lānaʻi, and Hawaiʻi Island (Big Island) in these separate posts.
If you’re trying to decide which island is right for your visit, check out my overview about each island in the post below.
Read My Separate Post: What is the Best Hawaiian Island to Visit?


What is the Best Time of Year to Visit Hawaiʻi?
The weather in Hawaiʻi can often appear to be warm and beautiful throughout the year, but in my experience, there is a lot more to consider when planning what time of year to visit the islands, such as what island you are considering, what sides of each island do you plan to stay, what activities are you most interested in, the wildlife, and countless other nuanced variables that can all impact the type of trip you can expect to have.
For these reasons, I highly recommend reading through my separate article to not only understand my thoughts regarding the best time of year to come to Hawaiʻi but also what you need to consider based on the time of year that you plan to visit.
Read My Separate Post: What is the Best Time of Year to Visit Hawaiʻi?
10 Best Tours & Excursions on Oʻahu
There are a lot of different tour options to choose from on Oʻahu, but to make it easier to decide, I made a list of my favorite tours because some things simply are better with a local guide!
Read My Separate Post: Best Tours on Oʻahu

Oʻahu
Safety
All hikes in Hawaiʻi should not be compared to trails outside of the islands, and hikers should exercise due caution on every adventure, given that many are extremely dangerous.
By this, I mean that Hawaiʻi is known for hot, humid weather, steep, dramatic, and unstable cliffs, and flash floods, which can occur without warning. Therefore, it is important that you check the local forecast, understand the physical condition of your entire group, and pack sufficient food and water before attempting any adventure.
Disclaimer
All information provided on this blog is for informational purposes only and is not intended to be a substitute for information or advice from qualified professionals or managing agencies.
Noah Lang Photography LLC makes no representations or warranties regarding the accuracy or completeness of the information provided here, and readers should use their own discretion, judgement, and seek professional advice where it is appropriate.
Furthermore, Noah Lang Photography LLC shall not be held responsible for any injuries, lost individuals, or legal issues arising from the use of information provided on this website, and if applicable, the above safety disclaimer should be referenced to provide a generic overview of the risks involved.
All said, the content on this blog is for the sole use of Noah Lang Photography LLC, and unauthorized use or reproduction of this content is strictly prohibited.
Disclosure
This post is not sponsored.
However, some of the links in this post are affiliate links, which means that I may earn a small commission if a purchase is made through one of those links. This commission comes at no additional cost to you, and I only recommend products that I personally use and believe will add value to my readers. Thank you for your support, which enables me to continue creating more!
To read the full privacy policy, click here.

About This Blog
Noah Lang Photography, also known as @noahawaii, is 100% reader-supported!
I do not accept guest articles or sponsored content of any kind on my blog, which is why, if you enjoy the outdoor and travel content I create, please consider buying me a coffee!
I appreciate your support, which helps me continue to keep this blog alive!