


Climbing King’s Peak via Henry’s Fork: The Highest Peak in Utah
Distance (Roundtrip): 29.1 miles / 46.8 km
The Henry’s Fork Trail to King’s Peak is, without a doubt, the most popular route to the top of Utah.
That being said, the roundtrip distance is quite substantial, which is why King’s Peak is most commonly climbed over the course of a few days. In our case, it was one day to Dollar Lake, one day for the summit, returning to Dollar Lake, and one day hiking back out to Henry’s Fork.
In any case, don’t underestimate how long King’s Peak would take to do in one day because what might look like a short section on a GPS, like the summit ridge, is much longer when you see it in person. However, a one-day push was somewhat of a popular option, but it does increase the risk of afternoon thunderstorms if you don’t end up moving as fast as you anticipated.
This was the case on the day we summited, and a few people who planned the trail in one day put themselves in a very dangerous situation high on the mountain because the thunderstorms rolled in right over the peak like clockwork!
For this reason, only people who are absolutely confident that they have the fitness to cover this amount of distance in one day should be considering a one-day approach. If it were me, I would plan on a 10 p.m. departure from Henry’s Fork, with a 10 a.m. turnaround time to be safe if I knew there was a thunderstorm risk in the afternoon.
Overall, our three-day, two-night trip was surprisingly on the short end compared to many other groups.
Henry’s Fork Trailhead Parking
Parking for the Henry’s Fork Trailhead is located in a large dirt parking lot at the end of Henry’s Fork Road, which was nearly full when we arrived by mid-morning around the middle of July.
That being said, most 2WD vehicles should be able to make it to the trailhead, granted that the road is snow-free. The road only got a little bumpy for the last 0.25 miles (0.4 km) before the parking lot.
Google Maps Directions: Henry’s Fork Trailhead
Hiking Checklist - Uinta Mountains
Obviously, for camping, you will need general backpacking gear. For this reason, I wrote a separate post about what backpacking gear is worth the money, from my experience, and what the best alternatives are to save you money.
Read My Separate Post: Best Ultralight Backpacking Gear
In addition, here is a complete list of must-have things that you will want for any hike in the Uinta Mountains.
Bear Spray & Holster - If you aren’t flying, don’t rent bear spray! It’s a waste of money. Prepare ahead of time by buying your own, as this may be one of the most important items on this list.
Osprey 3L Water Bladder - The Osprey 3L water bladder is the most universal hiking and backpacking water bladder on the market, and it’s my go-to because of the slide-off seal that allows it to be quickly filled from the top. Additionally, individual parts are easily replaceable, such as the bite valve.
Blister / Heel Protectors - I swear by these cheap, amazing heel protectors to prevent blisters for nearly every kind of hiking and backpacking that I do!
Black Diamond Headlamp - Personally, I recommend the Black Diamond Storm because it is one of the brightest, lightest, and longest-lasting headlamps on the market—and trust me, the weight-to-battery-life ratio really does matter!
Hiking / Trail Running Shoes - Depending on the type of trail, I prefer to use either the Keen Targhee for longer, more rugged hiking or the HOKA Zinal Trail-Running Shoe for lighter, less intense trails. In either case, both have been amazing to me for many years across countless environments, and both can be found in men’s and women’s sizes. - (Men’s Keen / Women’s Keen) (Men’s HOKA / Women’s HOKA)
Waterproof Rain Shell - You never know when it may rain, and I’ve learned over the years that a rain shell is far better than a rain jacket. By this, I mean that it’s best to have something that the water will roll right off of, which is why I recommend the Patagonia Torrentshell 3L available in both men’s and women’s sizes.
Sun Shirt w/ Hood - A quality sun shirt can be your best friend on a trail with minimal shade, which can be found in both men’s and women’s sizes.
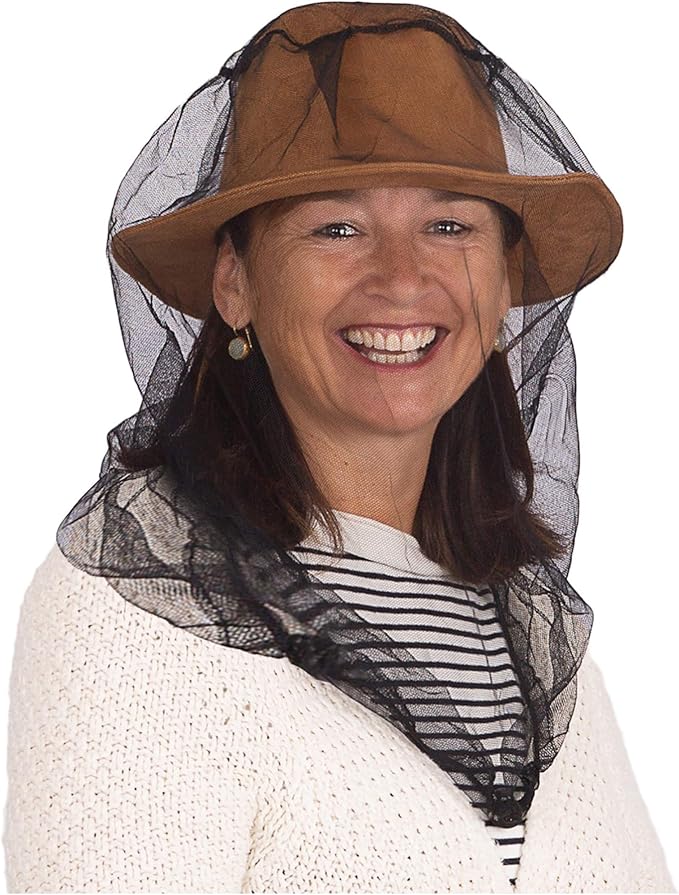
Head Bug Net - Deciding whether to pack a bug net should be based around the time of year that you’re visiting, meaning that as long as temperatures remain steadily above the mid-50s, the bugs can be brutal!
Wag bag - In some backcountry areas, all human waste is required to be packed out using one of these bags. When this is the case, plan on packing one bag for every night that you will be there, as having to reuse a bag twice is never a good idea.
High SPF Sunscreen - Packing high-SPF sunscreen is a must for long days outside!


Climbing King’s Peak
Beginning from the Henry’s Fork Trailhead, the hike to Dollar Lake gains roughly 1,400 ft. (427 m) of elevation over the course of 8.0 miles (12.9 km).
In my opinion, the elevation change felt extremely mild over this long distance, as there are only small sections where the incline is truly noticeable.
That being said, the first 0.5 miles (0.8 km) upon leaving the trailhead is one of the few places on the hike to Dollar Lake where the incline is a little steeper.
However, the Henry’s Fork Trail levels out shortly after as it winds its way through the Lodgepole Pine forest for the next few miles.
Dollar-Bear Lake Junction
At about 5.3 miles (8.5 km), the trail splits and opens up to a more panoramic view of the Uintas ahead.
To continue toward Dollar Lake, go left at the Dollar-Bear Lake junction.
Henry’s Fork
Shortly after the previous junction, the trail crosses over Henry’s Fork, which is the only stream crossing on the entire trail.
At about 7.5 miles (12.1 km) on the Henry’s Fork Trail, start watching your GPS as you approach Dollar Lake. The trail does not run directly past the lake, so if you’re not looking out for it, Dollar Lake can be easy to miss without even knowing it.
On that note, there was no obvious trail to get to Dollar Lake, and each time we cut back and forth between the trail and the lake, we wandered through the trees on the best path we could find.
Dollar Lake
Campsites can be found on three sides of Dollar Lake, but the best spots are easily on the north and west sides of the lake.
However, fishing was the best on the east side (far side) of Dollar Lake because this is where the depths begin to drop off. In my experience, everything on the trail side of the lake was a bit more difficult to fish because it was so shallow.


How Bad are the Mosquitoes?
If this is your first trip to the Uintas, you’re likely unprepared for how bad the mosquitoes will be, which is why I recommend grabbing this cheap bug net before going. You never know where and when you may want it, but in the evening, the mosquitoes can be out in clouds!

My Print - Dollar Lake
Climbing King’s Peak
When it comes to climbing King’s Peak, there are a few different approaches to consider, like the Uinta Highline Trail (traditional route) or the shortcut. Then, from the plateau, most ascend via Anderson Pass up the summit ridge, but after attempting this, I actually recommend a completely different and unconventional approach if you think you have the ability.
By unconventional, I mean the East Ridge to the summit, instead of the summit ridge via Anderson Pass. I’ll get to this more later.
In any case, I knew afternoon thunderstorms were very certain on the days during our visit, so we woke up at 2 a.m. and left by 2:20 for the top. Our group and only one other truly woke up early enough to avoid the risk of lightning high on the mountain.
For the next 2.8 miles (4.5 km), we followed the Henry’s Fork Trail to Gunsight Pass.
Gunsight Pass
From Gunsight Pass, we didn’t want to take the longer traditional route, so we opted for the shortcut.
However, since it was the middle of the night, we ended up climbing a lot of unnecessary elevation up and over the unnamed peak that you can see in the map here.
The real shortcut is the gray line, which felt impossible to tell where it was with only our headlamps in the dark.
Needless to say, our route worked, but the unnecessary climb just to descend all of it on the back side didn’t sit well.
From what I could see, the shortcut would sidehill the unnamed peak in the photos below until you work your way up and around the plateau.
Note that these photos were taken during the middle of July, so if there’s still snow on the route, you may need spikes and an axe to do the shortcut safely.


Since we descended King’s Peak on the traditional route, these photos are from the route that most hikers utilize.
Uinta Highline Trail
Once on the plateau, also called the Uinta Highline Trail, you’ll have to decide which route to the summit you want to take, and I recommend using the photo below to help decide.
Essentially, the little hump on the peak in the photo below is King’s Peak. The ridge coming up from the right of the peak is the traditional route via Anderson Pass, and the ridge on the left side of the peak, extending toward the plateau, is the East Ridge, which is the more direct route that I will most definitely climb in the future.
I say this because the traditional route via Anderson Pass is quite a distance from where this photo was taken, and then you have to go up. However, if you climb the east-facing ridge, you’ll easily cut out distance and time, but the climb would be a bit steeper overall.
That being said, the traditional route up King’s Peak is not a trail by any means, so by choosing the east-facing ridge, you would still be climbing the same class-two terrain to the summit without the hassle of going all the way around.
Comment below if you’ve tried this route. I’d love to hear your thoughts.
Anderson Pass
If you’re following the traditional route, go left at Anderson Pass to follow the summit ridge up to the top.
Essentially, the summit ridge is nothing more than one big ramp to the top, but toward the top, the route traverses what I like to call a 'house of cards'—meaning big boulders that may teeter under your weight.
King’s Peak
According to the USGS, the summit of King’s Peak is 13,528 ft. (4,123 m).
That being said, the long distance is the most difficult part about climbing to the top, not the elevation gain or anything that could be considered technical. King’s Peak is not a technical climb, granted that the hike is snow-free.
In fact, King’s Peak is generally considered to be one of the easier state high points, especially when compared to the neighboring Gannett Peak in Wyoming.
Warning
As previously mentioned, be aware of the possibility for afternoon thunderstorms. The moment we returned to camp, we started to hear lightning, as heavy clouds rolled in over the peak.
The photo below was taken back at Dollar Lake, and I estimate there was at least 15 people high on the peak who shouldn’t have been there. When the storm finally hit, we were pretty much confined to our tents for the rest of the day, as it hailed on us for quite some time.
For this reason, be sure to check Mountain Forecast before hiking in, because what looks like a nice day in the morning can quickly change come afternoon in the Rockies.
Mountain Forecast: King’s Peak
Dollar Lake to the Henry’s Fork Trailhead
The next day, we began hiking shortly after sunrise to make the most of the cool weather.
This is usually the part of the hike that most people dread because the moment you make it back into the trees, you lose the views of the mountains for the rest of the hike.
However, in my experience, the hike out seemed to fly by. When we first checked the distance, we were surprised to see that 8.0 miles (12.9 km) had turned into 2.0 miles (3.2 km), with the wilderness boundary surprising us shortly thereafter. I chalk that up to getting an early start!
Overall, King’s Peak via Henry’s Fork is a very busy midsummer adventure.
By this, I mean that we were one of countless groups at Henry’s Fork trying to climb King’s Peak, and I knew this because the trail registry only said that people were there to climb King’s, making Dollar Lake the busiest campsite in the area.
However, it still wasn’t hard to find a place to set up by ourselves, as the Uintas are not nearly as popular as other ranges in the country, like the Enchantments.
All said, I think when I return, I’ll either climb King’s Peak via the East Ridge or make my way over to Red Castle Lake, as that seems to be a spectacular place to enjoy a few days in the backcountry!
Additional Early Season Gear
Depending on the winter snowpack, micro-spikes may be necessary, as the trail reaches these more exposed sections of the hike, like the Gunsight Pass shortcut.
This is because upper-elevation trails, like the Henry’s Fork Trail, can be covered in snow well into June, making these sections extremely dangerous when they are snowy and icy.
I personally use the Yaktrax below.


Best Way to Find Places to Stay!
Wherever I travel, I love to start my search for places to stay on VRBO.
Even if I don’t end up booking through them, I think it’s one of the best ways to see what’s in the area!
Washington
Best Way to Book Rental Cars!
I travel quite a bit, and I know firsthand that finding a good rental car deal can be a challenge, but that’s why I recommend comparing all of your options with Discover Cars.
In short, Discover Cars is a well-known, reputable business that allows you to search for the best deal across companies, and they have the best full-refund cancellation policy I’ve ever seen, valid up to 72, or sometimes even 48, hours prior to your reservation!
Book Here: Discover Cars
Discover Cars!
Safety
From high alpine environments to the vast deserts across the southern parts of the state, Utah has some of the most diverse landscapes of any place across the West.
This is why risks associated with sun exposure, the extreme summer heat, and dehydration are some of the biggest concerns in Utah, which is why I highly recommend hiking with a quality sun shirt and a good water bladder, regardless of the season.
Furthermore, Utah is home to Black Bears, Mountain Lions, and numerous rattlesnake species, and while hiking in Black Bear territory usually presents less danger compared to Grizzlies, hiking with bear spray is never a bad idea. However, it’s really up to your own discretion and comfort level.
Aside from wildlife, Utah, like any Mountain West state, is known for its violent afternoon thunderstorms, which are more typical in the warmer summer months than other times of the year.
That said, it’s important to check the local forecast before setting off on any adventure, as lightning strikes are not uncommon in and near mountain ranges across the West. I have personally been knocked to the ground by a strike that hit near me in the past, and I confidently say that it’s an experience you don’t want to live through. This is why I highly recommend checking Mountain Forecast for any high-elevation adventures you may be interested in—especially when climbing a summit.
Finally, micro-spikes may be necessary for an early or late season adventure, but know that micro-spikes are never supposed to be a substitute for conditions that require crampons.
Disclaimer
All information provided on this blog is for informational purposes only and is not intended to be a substitute for information or advice from qualified professionals or managing agencies.
Noah Lang Photography LLC makes no representations or warranties regarding the accuracy or completeness of the information provided here, and readers should use their own discretion, judgement, and seek professional advice where it is appropriate.
Furthermore, Noah Lang Photography LLC shall not be held responsible for any injuries, lost individuals, or legal issues arising from the use of information provided on this website, and if applicable, the above safety disclaimer should be referenced to provide a generic overview of the risks involved.
All said, the content on this blog is for the sole use of Noah Lang Photography LLC, and unauthorized use or reproduction of this content is strictly prohibited.
Disclosure
This post is not sponsored.
However, some of the links in this post are affiliate links, which means that I may earn a small commission if a purchase is made through one of those links. This commission comes at no additional cost to you, and I only recommend products that I personally use and believe will add value to my readers. Thank you for your support, which enables me to continue creating more!
To read the full privacy policy, click here.

About This Blog
Noah Lang Photography, also known as @noahawaii, is 100% reader-supported!
I do not accept guest articles or sponsored content of any kind on my blog, which is why, if you enjoy the outdoor and travel content I create, please consider buying me a coffee!
I appreciate your support, which helps me continue to keep this blog alive!