Climbing Mt. Whitney via Whitney Portal in Lone Pine, California
Distance (Roundtrip): 20.9 miles / 33.6 km
Elevation Gain: ~6,200 ft. / 1,890 m
Rising nearly 14,800 ft. (4,511 m) from the nearby depths of the Badwater Basin, Mt. Whitney in the Sierra Nevada Mountains is one of the most sought-after summits in the lower 48.
That being said, the Mt. Whitney Trail via Whitney Portal is the easiest route to the summit of Mt. Whitney, and being the case, it’s the most preferred route among many people attempting to reach the summit, which is exactly why there is a permit system in place.
This aside, Mt. Whitney, in my opinion, is one of the best trails/ peaks for those looking to learn a handful of mountaineering skills to potentially use on more challenging climbs.
By this, I mean that I see Mt. Whitney as a great starting point to not only learn new skills but to see if you’re ready to move on to harder, more involved climbs around the country, such as Gannett Peak in Wyoming. To learn more, be sure to read the section at the end.
How to Get a Mt. Whitney Permit?
Between May 1 and November 1 on the Mount Whitney Trail, the Inyo National Forest abides by a strict quota of 160 people, 100 day-hikers and 60 overnight backpackers, with a maximum of 15 people per group on the trail per day.
Therefore, permits are required for anyone within what the Inyo National Forest considers the Mount Whitney Zone.
While there are multiple ways to get a permit, the best way, in my experience, is to wait for the unclaimed permits to be posted.
However, the traditional method is to enter the Mt. Whitney lottery, which usually opens at the beginning February and closes around the middle of March.
Then, once the lottery closes, the Inyo National Forest takes about a week and a half to publish the results, which will be sent out via email, regardless if your application was successful or not. Of all my applications, I’ve never been successful.
From here, successful applicants have about 2 weeks to pay for their permits or else if they don’t, the Inyo National Forest will post the unclaimed/ unpaid permits near the end of April.
In the past, this is how I've been successful, but I can only imagine that with increasing popularity across permitted areas, adventures such as the Mt. Whitney Trail, Glacier, Angels Landing, etc., will become increasingly more difficult, whether by lottery or this alternative method.
Finally, the last and least recommended way to get a permit is to show up in person at the Eastern Sierra Interagency Visitor Center to claim a permit that others have failed to show up for on their applied-for date and claim their permit instead.
Although you risk driving out to Lone Pine and not being successful, I have heard of good results using this method, so I’d say it’s worth a shot!
Book Here: Mt. Whitney Advanced Lottery
When to Pick Up Your Mt. Whitney Permit in Lone Pine?
If you are successful through one of the above methods, the most important thing of all is to pick up your permit at the Eastern Sierra Interagency Visitor Center in Lone Pine, or you will be hiking illegally without the proper tags and a permit in hand. The email sent through Recreation.gov is not the permit.
Therefore, the best way to pick up your Mt. Whitney permit is to show up during the visitor center’s normal operating hours one or two days prior to climbing. However, if you cannot make it during those times, call to make arrangements, so that you can pick up your permit outside of their normal business hours.
If you do show up early, I highly recommend camping in the the nearby Alabama Hills.
Google Maps Directions: Eastern Sierra Interagency Visitor Center
What is the Best Type of Mt. Whitney Permit?
When you apply to climb Mt. Whitney, you can either choose a day-use or overnight permit.
Personally, I recommend an overnight permit, which I believe makes for a better and more relaxed experience.
I say this because if you day-hike, you will be hiking roughly 21 miles (33.8 km) roundtrip, where you will most likely be exposed to the hot summer sun under little shade for roughly 10-14 hours, depending on your pace. It’s not unreasonable, but in my opinion, camping, enjoying the alpine lakes, and summiting at sunrise is the much better choice!
Therefore, I believe that one day to Trail Camp, one day to summit Mt. Whitney, while hiking out on the same day is the best overnight itinerary, weather depending.
What is the Best Time of Year to Climb Mt. Whitney?
If you’re only interested in hike the trail, the best rule of thumb is the later, the better.
In my experience, I’ve also climbed Mt. Whitney in the early season following a record snow year, which isn’t the worst if you’re interested in practicing some mountaineering skills, as mentioned previously. Here’s a general way to think about it.
In May, you should almost always expect snow. However, by the middle to late June, you should 'ideally' have a snow-free trail on Mt. Whitney, which will become drier and drier as the summer goes on.
Nevertheless, conditions obviously vary from year to year, as I’ve seen firsthand, but generally speaking, the later in the season, the more climbing Mt. Whitney turns into a hike rather than a climb.
The problems generally faced surrounding a lingering snowpack is that on the upper mountain, the temperature midday will reach well above freezing, turning what would be walking on normally firm snow into annoying slush. For this reason, if you expect to be climbing through a heavy snowpack, it’s best to climb through the night when you expect the snow to be its firmest.
Mt. Whitney Trailhead Parking
Parking for the Mt. Whitney Trail is located in a large parking lot at the very end of Whitney Portal Road.
That being said, expect the parking area to be very competitive during the peak summer busy season, even if you arrive during the night. Whitney Portal is, without a doubt, one of the most popular trailheads in the eastern Sierras.
Additionally, bear activity is fairly high at the Mt. Whitney Trailhead, and they have been known to break into cars that have food in them. Therefore, be sure to use the provided lockers and label your bag or container with a name and date.
Google Maps Directions: Whitney Portal
Hiking Checklist - Sierra Mountains
Obviously, for camping, you will need general backpacking gear. For this reason, I wrote a separate post about what backpacking gear is worth the money, from my experience, and what the best alternatives are to save you money.
Read My Separate Post: Best Ultralight Backpacking Gear
In addition, bear canisters and wag bags are required on the Mt. Whitney Trail, but it seems that the canisters are more for the marmots than the bears.
Bear Spray & Holster - If you aren’t flying, don’t rent bear spray! It’s a waste of money. Prepare ahead of time by buying your own, as this may be one of the most important items on this list.
Osprey 3L Water Bladder - The Osprey 3L water bladder is the most universal hiking and backpacking water bladder on the market, and it’s my go-to because of the slide-off seal that allows it to be quickly filled from the top. Additionally, individual parts are easily replaceable, such as the bite valve.
Blister / Heel Protectors - I swear by these cheap, amazing heel protectors to prevent blisters for nearly every kind of hiking and backpacking that I do!
Black Diamond Headlamp - Personally, I recommend the Black Diamond Storm because it is one of the brightest, lightest, and longest-lasting headlamps on the market—and trust me, the weight-to-battery-life ratio really does matter!
Hiking / Trail Running Shoes - Depending on the type of trail, I prefer to use either the Keen Targhee for longer, more rugged hiking or the HOKA Zinal Trail-Running Shoe for lighter, less intense trails. In either case, both have been amazing to me for many years across countless environments, and both can be found in men’s and women’s sizes. - (Men’s Keen / Women’s Keen) (Men’s HOKA / Women’s HOKA)
Waterproof Rain Shell - You never know when it may rain, and I’ve learned over the years that a rain shell is far better than a rain jacket. By this, I mean that it’s best to have something that the water will roll right off of, which is why I recommend the Patagonia Torrentshell 3L available in both men’s and women’s sizes.
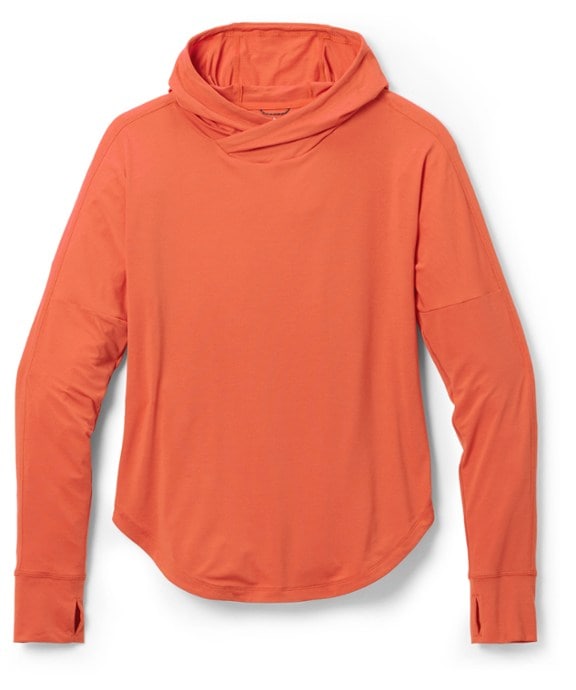
Sun Shirt w/ Hood - A quality sun shirt can be your best friend on a trail with minimal shade, which can be found in both men’s and women’s sizes.
Head Bug Net - Deciding whether to pack a bug net should be based around the time of year that you’re visiting, meaning that as long as temperatures remain steadily above the mid-50s, the bugs can be brutal!
Wag bag - In some backcountry areas, all human waste is required to be packed out using one of these bags. When this is the case, plan on packing one bag for every night that you will be there, as having to reuse a bag twice is never a good idea.
High SPF Sunscreen - Packing high-SPF sunscreen is a must for long days outside!
Additional Early Season Gear
Depending on the winter snowpack and how early in the season you are permitted to climb, additional gear such as an ice axe, crampons, and definitely a helmet should be considered.
I say this because there are always snowy years in the Sierras, as well as climbing early in the season, which typically present heavier conditions compared to the later summer months.
Furthermore, if an ice axe is necessary, make sure that you know how to choose the correct size for your height.
Hiking the Mt. Whitney Trail
Whitney Portal to Trail Camp
From Whitney Portal to Trail Camp, expect nearly no breaks from the constant elevation gain, as essentially the entire trail is uphill.
Nonetheless, there are two designated campsites along the Mt. Whitney Trail, which are Outpost Camp and Trail Camp. However, if you’ve secured an overnight permit for one night only, then on your first day, I recommend making your way to Trail Camp.
I say this because Trail Camp is significantly closer to the summit, making it a much easier choice for an early morning push to the top.
Personally, this is what I always choose to do, and I believe it is the best method because you don’t have to deal with as much direct sun exposure on the upper mountain.
That being said, the sun exposure above tree line is essentially inevitable, which is why I recommend coming prepared with a hooded sun shirt, like the ones below. On top of this, don’t forget to bring with a bear canister, as they are a requirement for food storage for all overnight permits.
Trail Camp to Mt. Whitney Summit
Warning
If you’re climbing following a heavy snow season, the chute just to the north (right) of the switchbacks may be the best option. Essentially, the chute is a steep couloir that leads directly to the Trail Crest just to the right of the switchbacks. However, climbing up the chute in heavy snow conditions requires prior knowledge of how to properly use an ice axe and potentially crampons. The same could be said if the switchbacks were snowed over too.
That being said, if you have no prior experience or knowledge with this kind of gear, don’t attempt Mt. Whitney under such conditions.
While that may seem contradictory to what I said previously about Mt. Whitney being a great peak to learn certain mountaineering skills, it’s only a great training ground if you have someone like a qualified friend or guide to learn from. If not, you could take a very serious or even fatal fall if you were to fall the length of the chute without the knowledge to stop yourself.
My Experience Climbing in a Heavy Snowpack
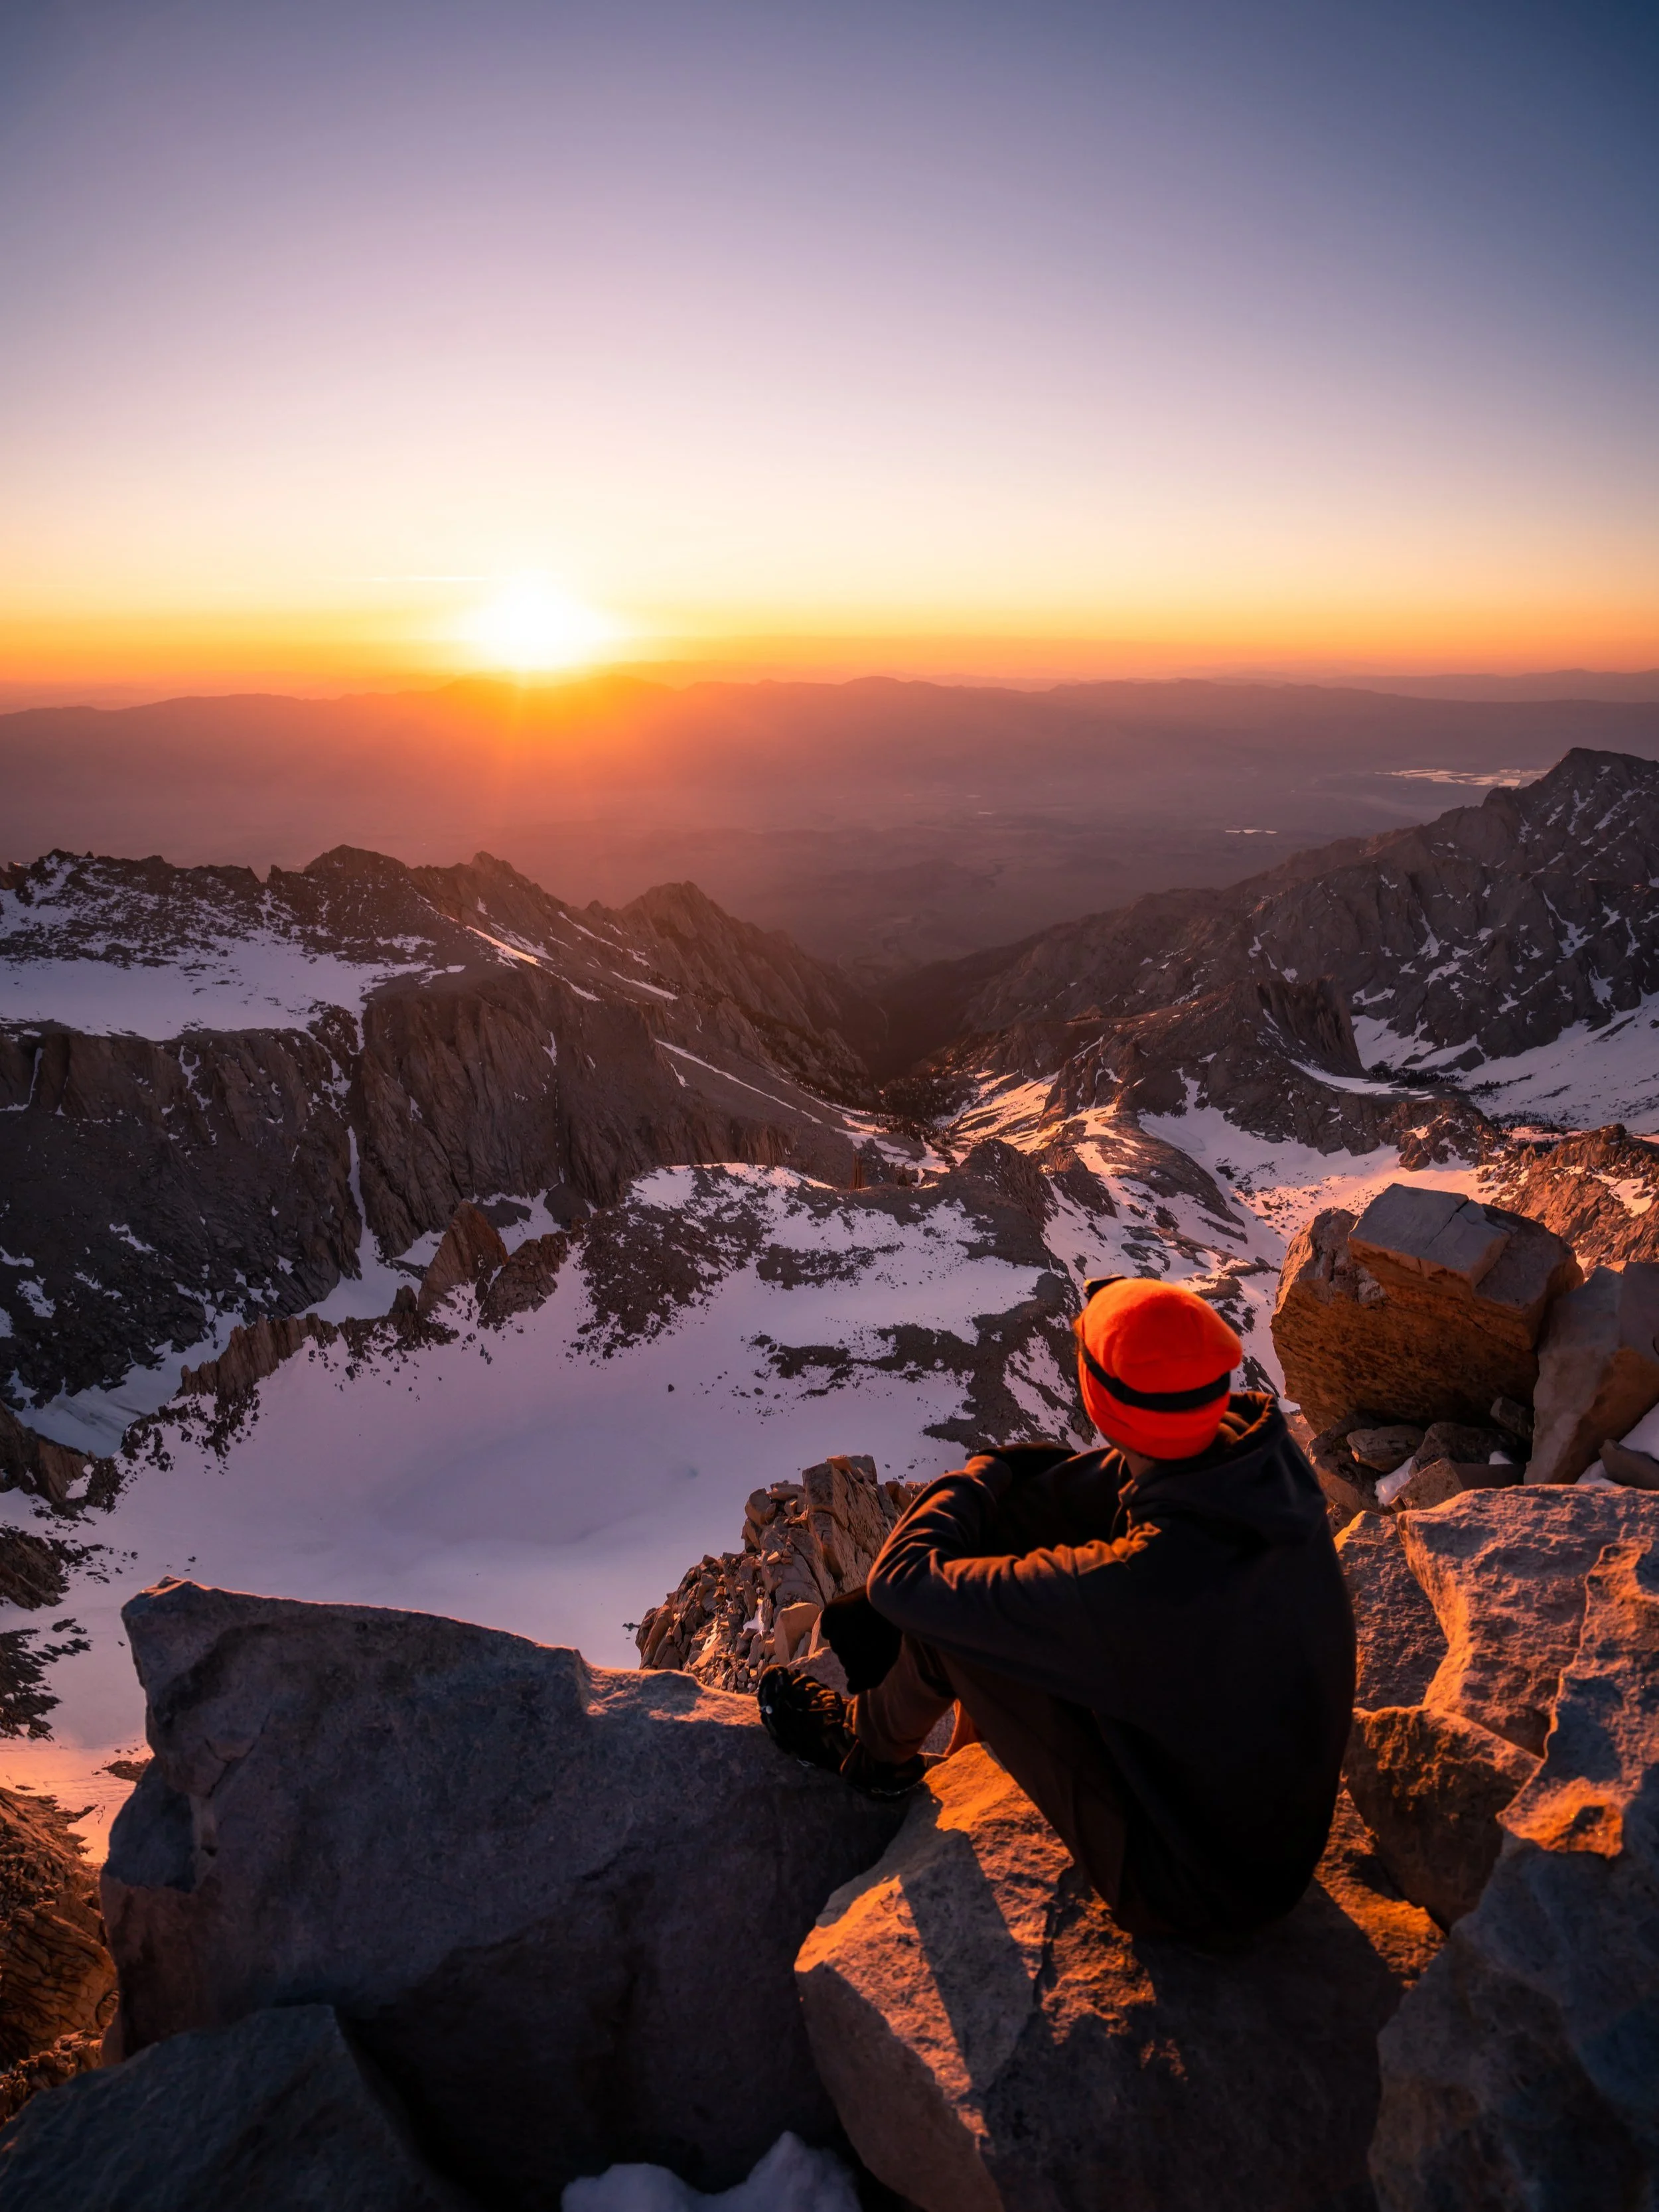
During my experience on Mt. Whitney following a heavy snow year, my friend and I left Trail Camp at 2:30 a.m. for a 5:30 a.m. sunrise at the summit.
Know that three hours to summit Mt. Whitney may be more or less than what’s needed, depending on the snowpack and your group’s fitness.
In any case, we chose to climb what we could see of the switchbacks and got off the switchbacks at about 4:26 a.m.
Then, from the Trail Crest to the summit of Mt. Whitney, we made it to the top in about one hour, right at 5:30 a.m. for sunrise.
All said, if I had known how difficult it was going to be with the crappy snow, even during the night, I would have chosen to leave 30 minutes earlier.
Mt. Whitney Summit to Whitney Portal
If you’re not dealing with the snow, the hike out should be very straightforward.
However, if you are dealing with snow, descending off the upper mountain can be more dangerous when the snow starts to soften, as it will likely give way under your weight.
In this case, glissading may be the best and safest option, but again, this should not be attempted without prior experience or someone more qualified to help your team descend safely. Simple things, such as removing your spikes or crampons, can be the difference between a safe and unsafe experience.
In any case, once we returned back to Trail Camp and packed up, my friend and I hiked out from Trail Camp to Mt. Whitney Portal in exactly 2 hours and 40 minutes.
How Bad are the Marmots on Mt. Whitney?
The marmots on the Mt. Whitney Trail are fairly aggressive!
Therefore, it’s very important that anytime you leave your tent, whether briefly or for a summit push, you leave the doors wide open!
If marmots think there might be food in your tent or if there is, they will chew a hole into your tent in seconds, and your expensive backpacking tent will be ruined! This is exactly why I wrote that it seem bear canisters are more for the marmots than the bears.
In a different mountain range, I had my tent doors open with no food inside, and they still chewed up some of my gear that had a strong scent on it, which could be anything with sweat.
For this reason, it’s not a bad idea to pack up whatever you care about the most, even though it will add more weight to your hike.
Learning Basic Mountaineering Skills on Mt. Whitney
For obvious reasons, Mt. Whitney can’t present every type of mountaineering scenario that one would need to know. However, the trail, or rather the chute below Trail Crest, presents a unique opportunity to practice basic skills such as self-arrest, establishing fixed protection, glissading, and climbing on a rope team, granted that you climb during the early summer season.
Additionally, the chute is also one of the best places to learn because if something were to go wrong, help may only be a short distance away down at Trail Camp.
Warning
Afternoon thunderstorms in high Mountain West areas, such as this, are a serious concern during the summer monsoon season.
Even if the weather forecast doesn’t predict any storms, I can tell you from personal experience that they may show up out of nowhere and can put you and your entire group in a very dangerous situation.
I say this to emphasize the importance of turning around at the first sign of lightning, thunder, or even heavy cloud buildup. However, if you ever get caught in a storm unsuspectingly, follow the steps linked below to reduce the risk of getting struck.
U.S. Forest Service: Lightning Safety Tips
More Nearby Adventures
If you’re interested in reading about some more amazing adventures nearby, check out my separate posts below!
Best Way to Find Places to Stay!
Wherever I travel, I love to start my search for places to stay on VRBO.
Even if I don’t end up booking through them, I think it’s one of the best ways to see what’s in the area!
Best Way to Book Rental Cars!
I travel quite a bit, and I know firsthand that finding a good rental car deal can be a challenge, but that’s why I recommend comparing all of your options with Discover Cars.
In short, Discover Cars is a well-known, reputable business that allows you to search for the best deal across companies, and they have the best full-refund cancellation policy I’ve ever seen, valid up to 72, or sometimes even 48, hours prior to your reservation!
Book Here: Discover Cars
Safety
Generally speaking, falling rocks and falls in general present the greatest risk to climbers on Mt. Whitney. Therefore, it’s never a bad idea to climb with a helmet, especially if there are groups above you.
One year when I started to climb, the news everywhere started to report a missing hiker who hadn’t been seen since summiting Whitney. Subsequently, later reports showed that the hiker fell to his death, likely from the snowy/ icy conditions on the trail that I mentioned previously.
In any case, from Trail Crest and on, the ridgeline traverses across numerous high-exposure areas where you cannot fall. Therefore, to know what kind of gear may be necessary for a safe early-season climb, I recommend reading the reviews on AllTrails, Mountain Project, and SummitPost to see what people are saying.
Lastly, come prepared for the wildlife. While hiking in black bear territory generally presents less danger as opposed to grizzlies, hiking with bear spray is never a bad idea. In my experience, the bears are generally present at the lower elevations while you’re below the tree line, but they can and will wander anywhere throughout the trail.
As always find the most up-to-date information and conditions on the official Inyo National Forest website for Mount Whitney.
Disclaimer
All information provided on this blog is for informational purposes only and is not intended to be a substitute for information or advice from qualified professionals or managing agencies.
Noah Lang Photography LLC makes no representations or warranties regarding the accuracy or completeness of the information provided here, and readers should use their own discretion, judgement, and seek professional advice where it is appropriate.
Furthermore, Noah Lang Photography LLC shall not be held responsible for any injuries, lost individuals, or legal issues arising from the use of information provided on this website, and if applicable, the above safety disclaimer should be referenced to provide a generic overview of the risks involved.
All said, the content on this blog is for the sole use of Noah Lang Photography LLC, and unauthorized use or reproduction of this content is strictly prohibited.
Disclosure
This post is not sponsored.
However, some of the links in this post are affiliate links, which means that I may earn a small commission if a purchase is made through one of those links. This commission comes at no additional cost to you, and I only recommend products that I personally use and believe will add value to my readers. Thank you for your support, which enables me to continue creating more!
To read the full privacy policy, click here.

About This Blog
Noah Lang Photography, also known as @noahawaii, is 100% reader-supported!
I do not accept guest articles or sponsored content of any kind on my blog, which is why, if you enjoy the outdoor and travel content I create, please consider buying me a coffee!
I appreciate your support, which helps me continue to keep this blog alive!


